
Overview
Overview
This tutorial is designed to help you learn to create your own machine learning pipelines using TensorFlow Extended (TFX) and Apache Airflow as the orchestrator. It runs on on Vertex AI Workbench, and shows integration with TFX and TensorBoard as well as interaction with TFX in a Jupyter Lab environment.
What you'll be doing?
You’ll learn how to create an ML pipeline using TFX
- A TFX pipeline is a Directed Acyclic Graph, or "DAG". We will often refer to pipelines as DAGs.
- TFX pipelines are appropriate when you will be deploying a production ML application
- TFX pipelines are appropriate when datasets are large, or may grow to be large
- TFX pipelines are appropriate when training/serving consistency is important
- TFX pipelines are appropriate when version management for inference is important
- Google uses TFX pipelines for production ML
Please see the TFX User Guide to learn more.
You'll follow a typical ML development process:
- Ingesting, understanding, and cleaning our data
- Feature engineering
- Training
- Analyzing model performance
- Lather, rinse, repeat
- Ready for production
Apache Airflow for Pipeline Orchestration
TFX orchestrators are responsible for scheduling components of the TFX pipeline based on the dependencies defined by the pipeline. TFX is designed to be portable to multiple environments and orchestration frameworks. One of the default orchestrators supported by TFX is Apache Airflow. This lab illustrates the use of Apache Airflow for TFX pipeline orchestration. Apache Airflow is a platform to programmatically author, schedule and monitor workflows. TFX uses Airflow to author workflows as directed acyclic graphs (DAGs) of tasks. The rich user interface makes it easy to visualize pipelines running in production, monitor progress, and troubleshoot issues when needed. Apache Airflow workflows are defined as code. This makes them more maintainable, versionable, testable, and collaborative. Apache Airflow is suited for batch processing pipelines. It is lightweight and easy to learn.
In this example, we are going to run a TFX pipeline on an instance by manually setting up Airflow.
The other default orchestrators supported by TFX are Apache Beam and Kubeflow.
Apache Beam can run on
multiple data processing backends (Beam Ruunners). Cloud Dataflow is one such
beam runner which can be used for running TFX pipelines. Apache Beam can be used
for both streaming and batch processing pipelines.
Kubeflow is an open source ML
platform dedicated to making deployments of machine learning (ML) workflows on
Kubernetes simple, portable and scalable. Kubeflow can be used as an
orchestrator for TFFX pipelines when they need to be deployed on Kubernetes
clusters. In addition, you can also use your own
custom orchestrator
to run a TFX pipeline.
Read more about Airflow here.
Chicago Taxi Dataset

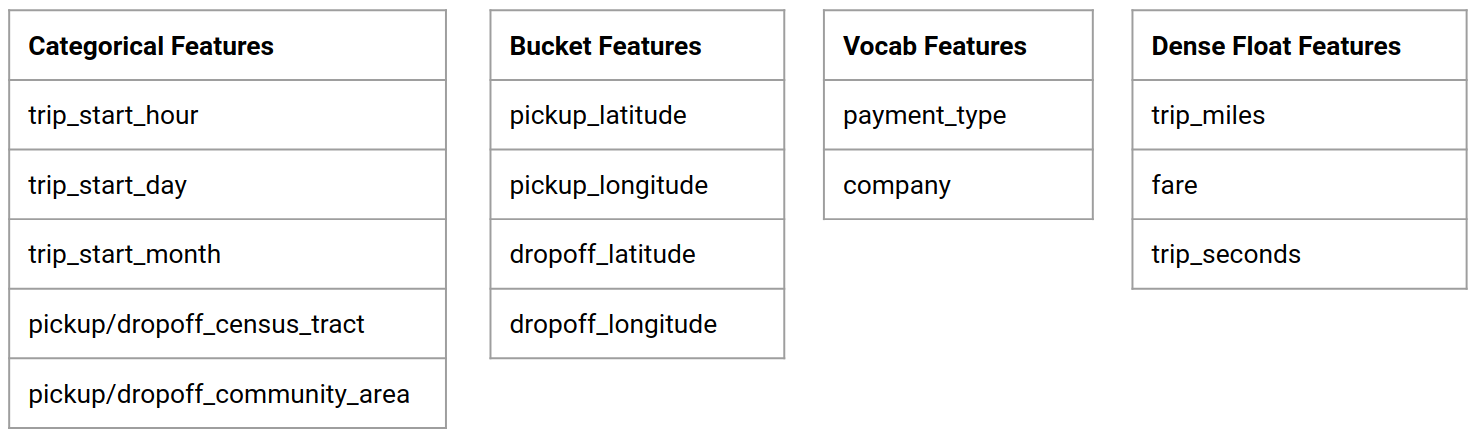
You'll be using the Taxi Trips dataset released by the City of Chicago.
Model Goal - Binary classification
Will the customer tip more or less than 20%?
Setup the Google Cloud Project
Before you click the Start Lab button Read these instructions. Labs are timed and you cannot pause them. The timer, which starts when you click Start Lab, shows how long Google Cloud resources will be made available to you.
This hands-on lab lets you do the lab activities yourself in a real cloud environment, not in a simulation or demo environment. It does so by giving you new, temporary credentials that you use to sign in and access Google Cloud for the duration of the lab.
What you need To complete this lab, you need:
- Access to a standard internet browser (Chrome browser recommended).
- Time to complete the lab.
How to start your lab and sign in to the Google Cloud Console 1. Click the Start Lab button. If you need to pay for the lab, a pop-up opens for you to select your payment method. On the left is a panel populated with the temporary credentials that you must use for this lab.
- Copy the username, and then click Open Google Console. The lab spins up resources, and then opens another tab that shows the Sign in page.
Tip: Open the tabs in separate windows, side-by-side.
- In the Sign in page, paste the username that you copied from the left panel. Then copy and paste the password.
- Click through the subsequent pages:
- Accept the terms and conditions.
Do not add recovery options or two-factor authentication (because this is a temporary account).
Do not sign up for free trials.
After a few moments, the Cloud Console opens in this tab.
Activate Cloud Shell
Cloud Shell is a virtual machine that is loaded with development tools. It offers a persistent 5GB home directory and runs on the Google Cloud. Cloud Shell provides command-line access to your Google Cloud resources.
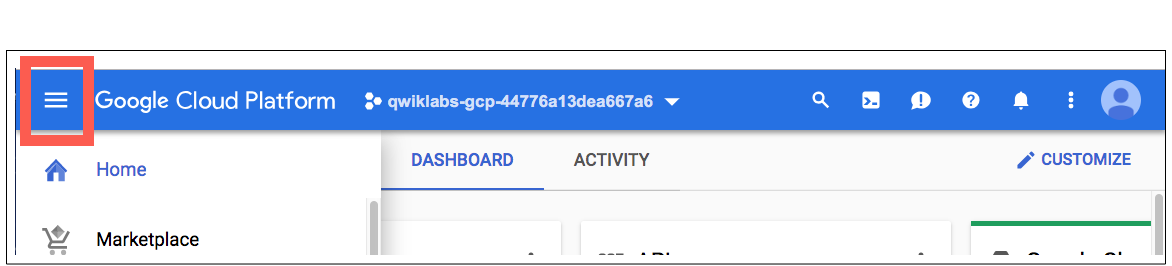
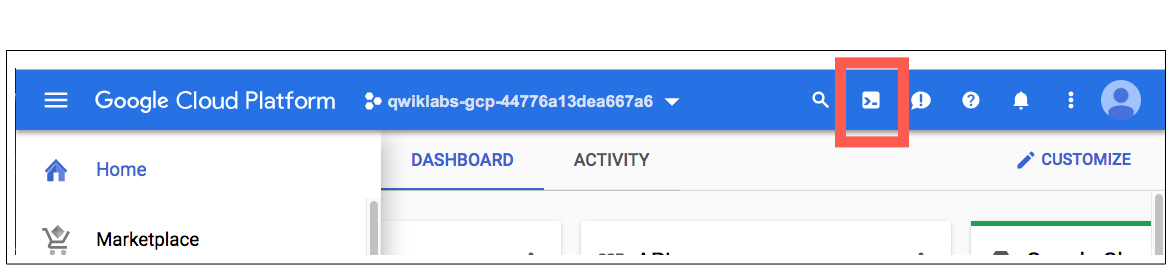
In the Cloud Console, in the top right toolbar, click the Activate Cloud Shell button.
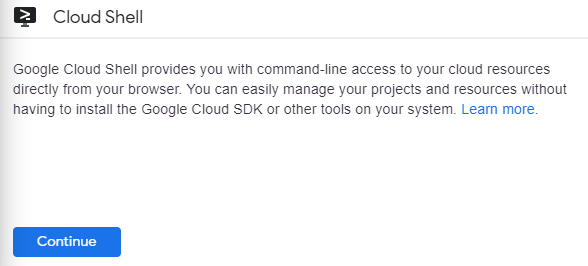
Click Continue.
It takes a few moments to provision and connect to the environment. When you are connected, you are already authenticated, and the project is set to your _PROJECTID. For example:

gcloud is the command-line tool for Google Cloud. It comes pre-installed on
Cloud Shell and supports tab-completion.
You can list the active account name with this command:
gcloud auth list
(Output)
ACTIVE: * ACCOUNT: student-01-xxxxxxxxxxxx@qwiklabs.net To set the active account, run: $ gcloud config set account
ACCOUNT
You can list the project ID with this command: gcloud config list project
(Output)
[core] project =
(Example output)
[core] project = qwiklabs-gcp-44776a13dea667a6
For full documentation of gcloud see the gcloud command-line tool overview.
Enable Google Cloud services
- In Cloud Shell, use gcloud to enable the services used in the lab.
gcloud
services enable notebooks.googleapis.com
Deploy Vertex Notebook instance
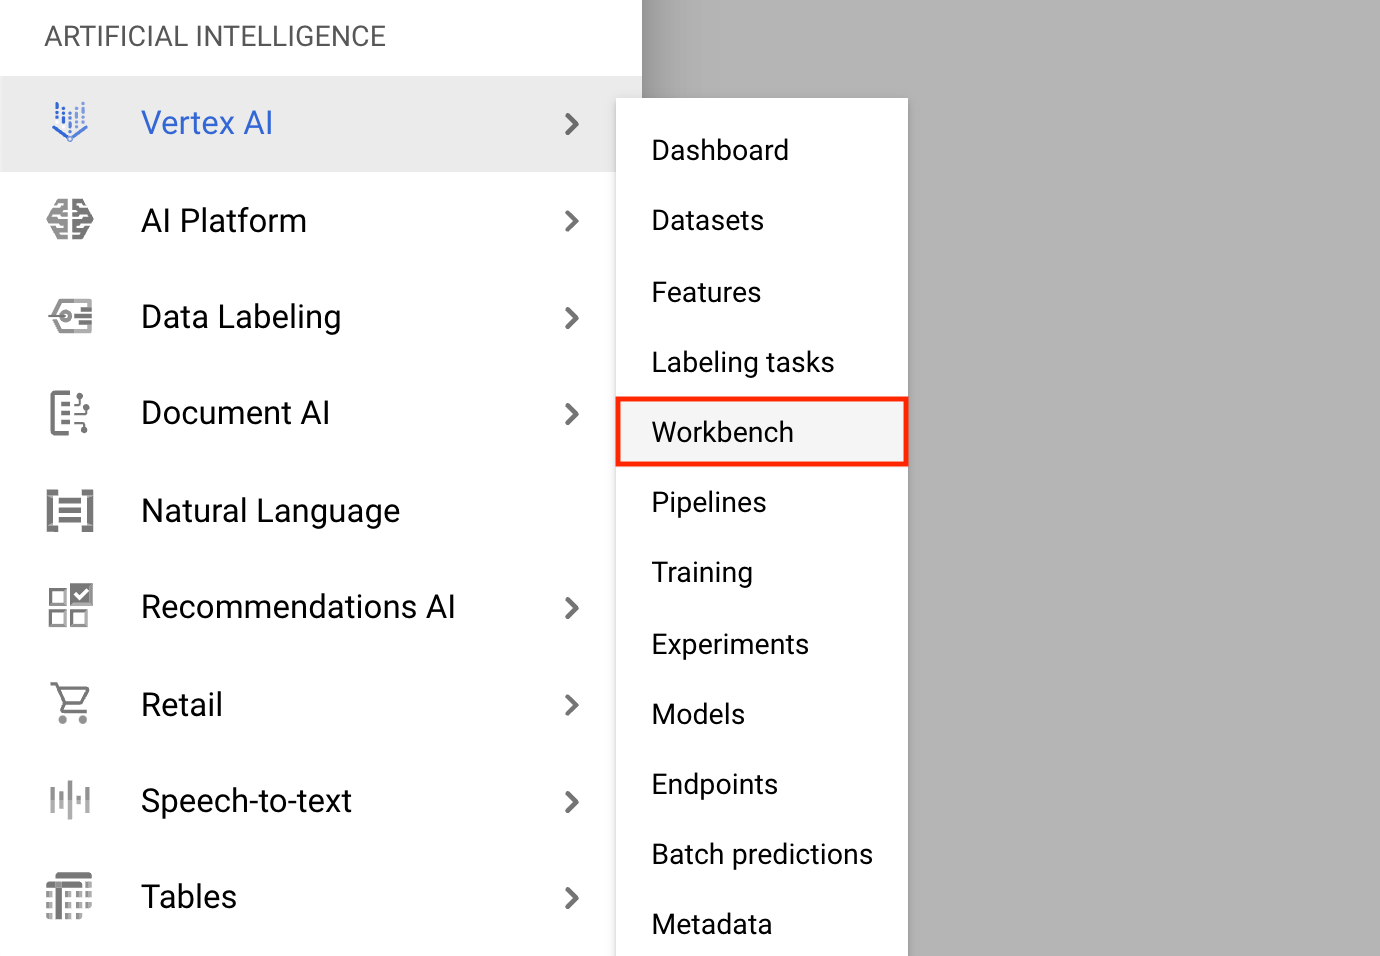
- Click on the Navigation Menu and navigate to Vertex AI, then to Workbench.
On the Notebook instances page, click New Notebook.
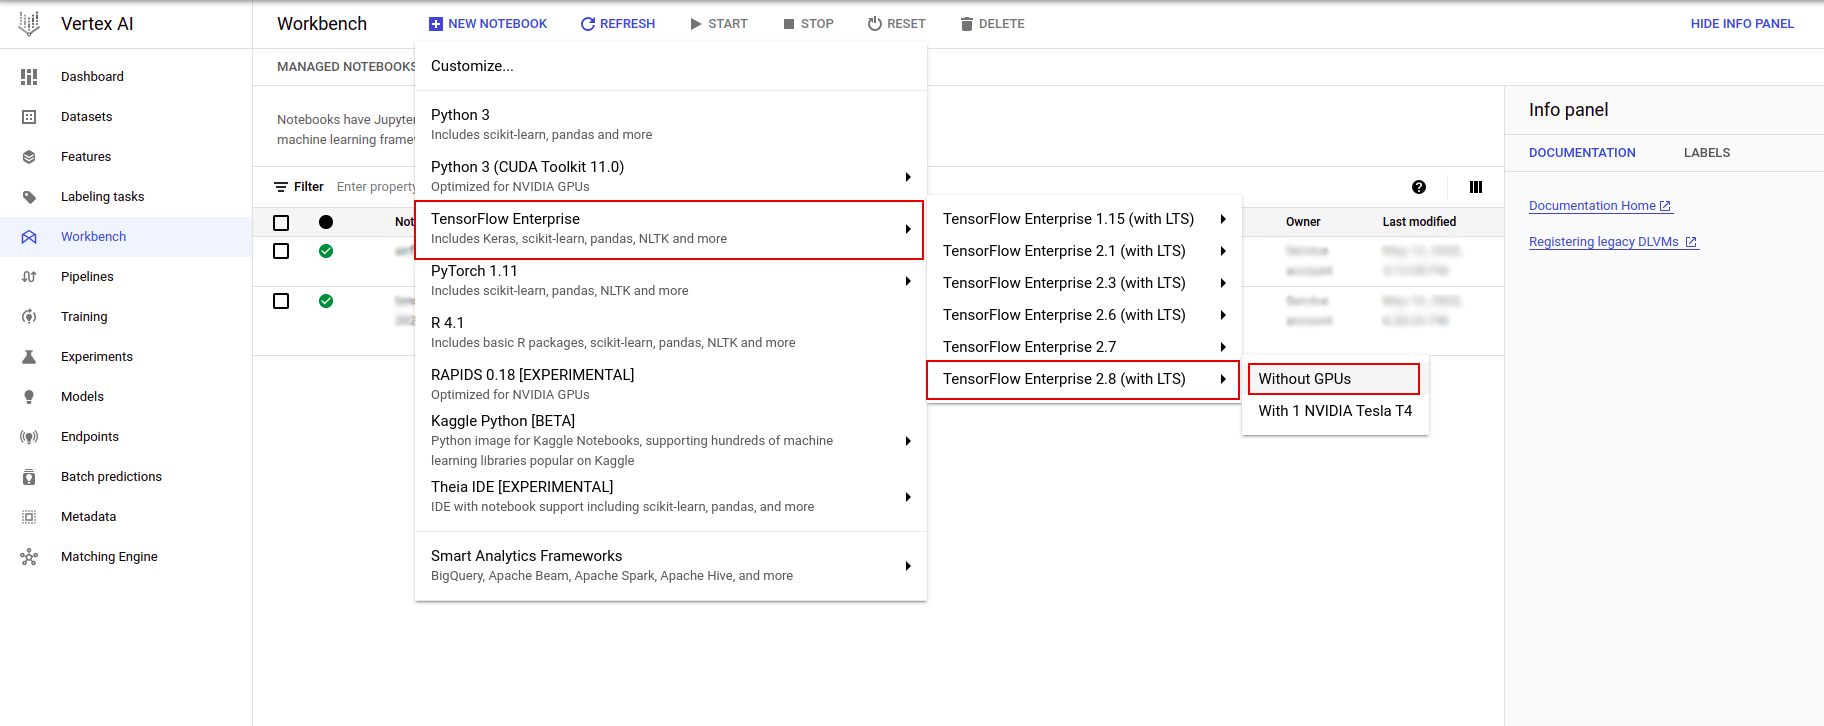
In the Customize instance menu, select TensorFlow Enterprise and choose the version of TensorFlow Enterprise 2.x (with LTS) > Without GPUs.
In the New notebook instance dialog, click the pencil icon to Edit instance properties.
For Instance name, enter a name for your instance.
For Region, select
us-east1and for Zone, select a zone within the selected region.Scroll down to Machine configuration and select e2-standard-2 for Machine type.
Leave the remaining fields with their default and click Create.
After a few minutes, the Vertex AI console will display your instance name, followed by Open Jupyterlab.
- Click Open JupyterLab. A JupyterLab window will open in a new tab.
Setup the environment
Clone the lab repository
Next you'll clone the tfx repository in your JupyterLab instance. 1. In
JupyterLab, click the Terminal icon to open a new terminal.
Cancel for
Build Recommended.
- To clone the
tfxGithub repository, type in the following command, and press Enter.
git clone https://github.com/tensorflow/tfx.git
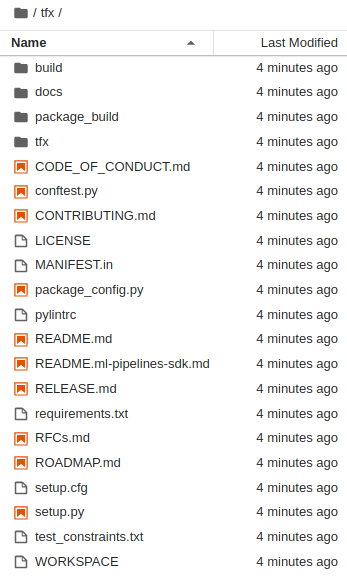
- To confirm that you have cloned the repository, double-click the
tfxdirectory and confirm that you can see its contents.
Install lab dependencies
- Run the following to go to the
tfx/tfx/examples/airflow_workshop/taxi/setup/folder, then run./setup_demo.shto install lab dependencies:
cd ~/tfx/tfx/examples/airflow_workshop/taxi/setup/
./setup_demo.sh
The above code will
- Install the required packages.
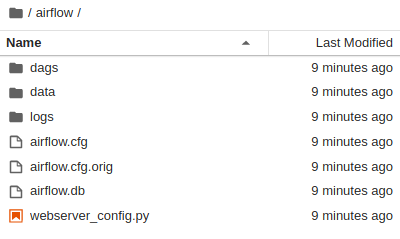
- Create an
airflowfolder in the home folder. - Copy the
dagsfolder fromtfx/tfx/examples/airflow_workshop/taxi/setup/folder to~/airflow/folder. - Copy the csv file from
tfx/tfx/examples/airflow_workshop/taxi/setup/datato~/airflow/data.
Configuring Airflow server
Create firewall rule to access to airflow server in the browser
- Go to
<a href="https://console.cloud.google.com/networking/firewalls/list">https://console.cloud.google.com/networking/firewalls/list</a>and make sure the project name is selected appropriately - Click on
CREATE FIREWALL RULEoption on top
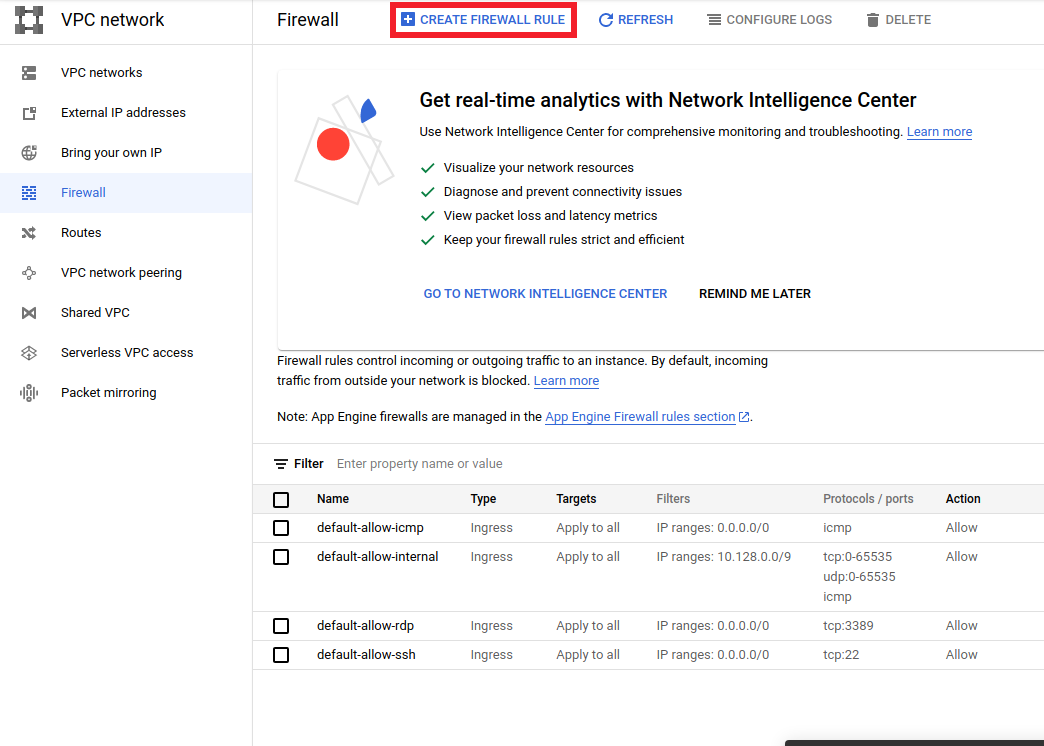
In the Create a firewall dialog, follow the steps listed below.
- For Name, put
airflow-tfx. - For Priority, select
1. - For Targets, select
All instances in the network. - For Source IPv4 ranges, select
0.0.0.0/0 - For Protocols and ports, click on
tcpand enter7000in the box next totcp - Click
Create.

Run airflow server from your shell
In the Jupyter Lab Terminal window, change to home directory, run the airflow
users create command to create an admin user for Airflow:
cd
airflow users create --role Admin --username admin --email admin --firstname admin --lastname admin --password admin
Then run the airflow webserver and airflow scheduler command to run the
server. Choose port 7000 since it is allowed through firewall.
nohup airflow webserver -p 7000 &> webserver.out &
nohup airflow scheduler &> scheduler.out &
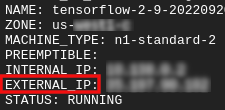
Get your external ip
- In Cloud Shell, use
gcloudto get the External IP.
gcloud compute instances list
Running a DAG/Pipeline
In a browser
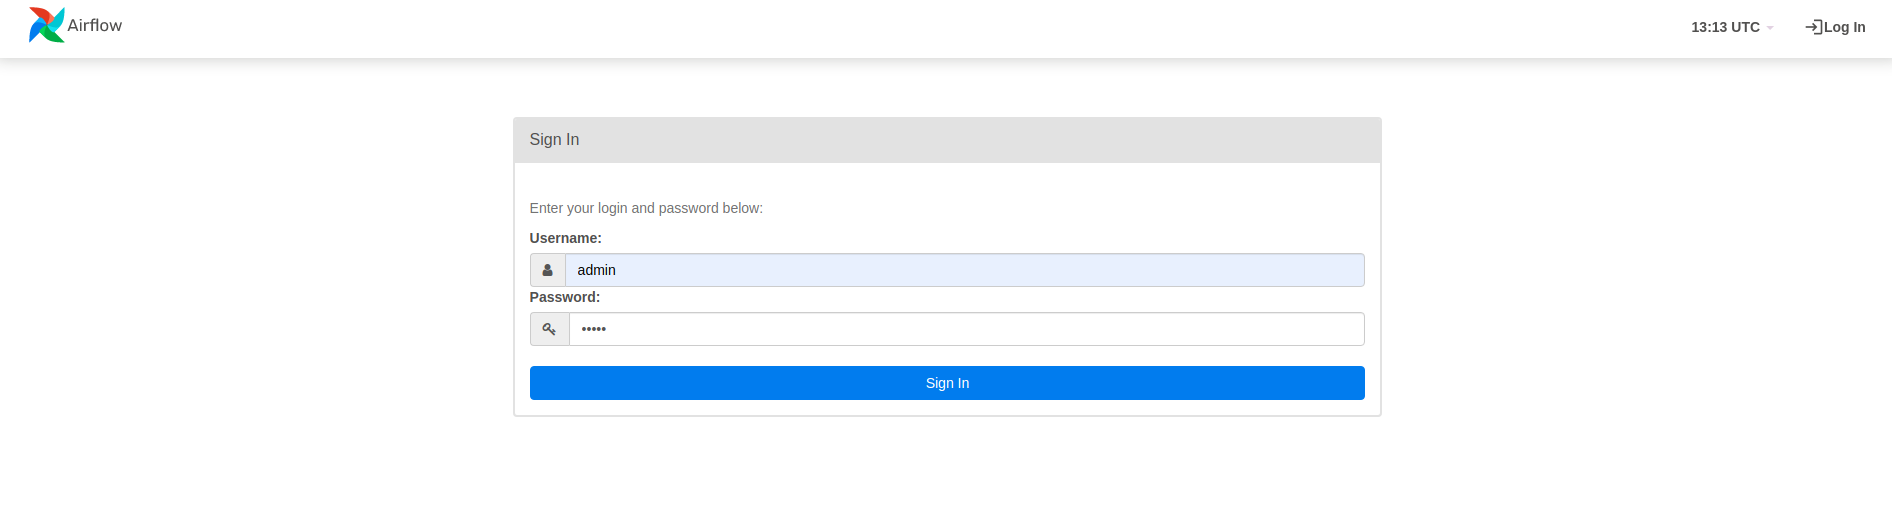
Open a browser and go to http://
- In the login page, enter the username(
admin) and password(admin) you chose when running theairflow users createcommand.
Airflow loads DAGs from Python source files. It takes each file and executes it.
Then it loads any DAG objects from that file. All .py files which define DAG
objects will be listed as pipelines in the airflow homepage.
In this tutorial, Airflow scans the ~/airflow/dags/ folder for DAG objects.
If you open ~/airflow/dags/taxi_pipeline.py and scroll to the bottom, you can
see that it creates and stores a DAG object in a variable named DAG. Hence it
will be listed as a pipeline in the airflow homepage as shown below:
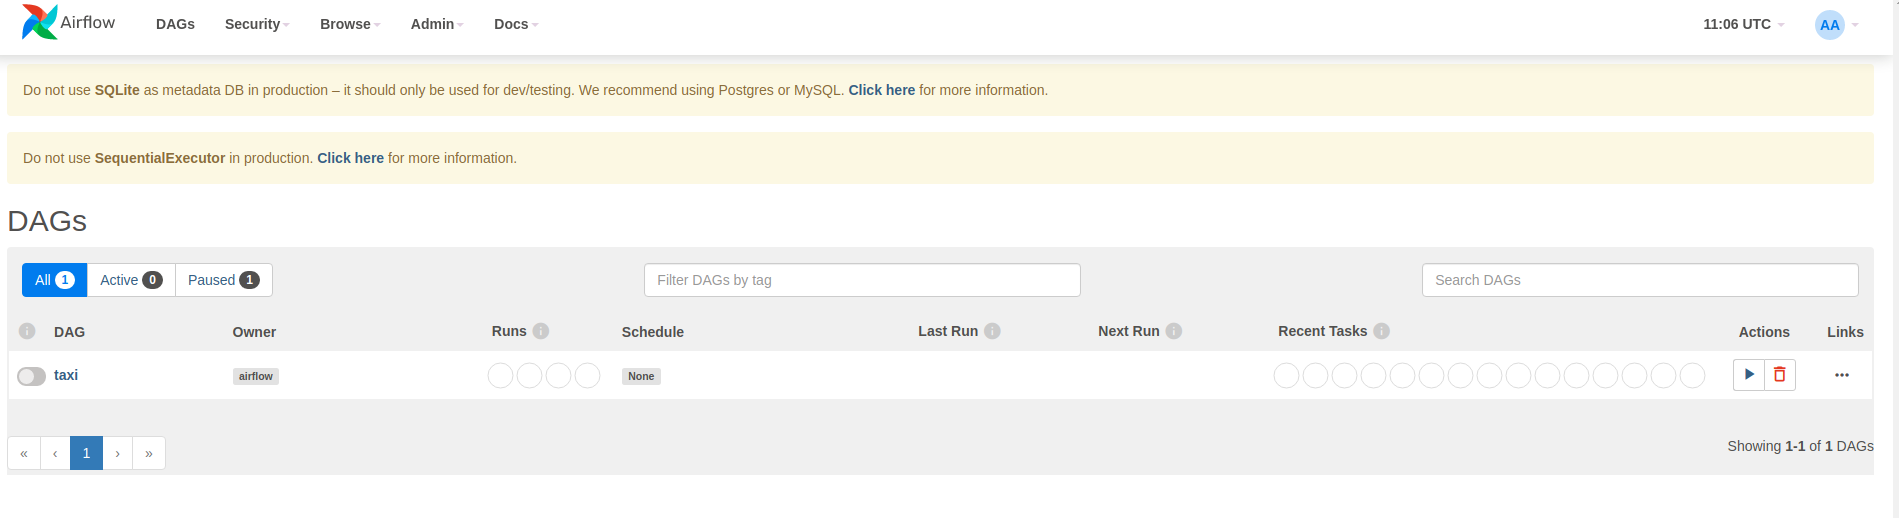
If you click on taxi, you will be redirected to the grid view of the DAG. You
can click the Graph option on top to get the graph view of the DAG.
Trigger the taxi pipeline
On the homepage you can see the buttons that can be used to interact with the DAG.
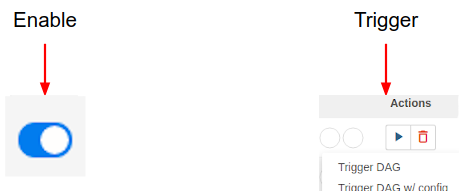
Under the actions header, click on the trigger button to trigger the pipeline.
In the taxi DAG page, use the button on the right to refresh the state of the graph view of the DAG as the pipeline runs. Additionally, you can enable Auto Refresh to instruct Airflow to automatically refresh the graph view as and when the state changes.

You can also use the Airflow CLI in the terminal to enable and trigger your DAGs:
# enable/disable
airflow pause <your DAG name>
airflow unpause <your DAG name>

# trigger
airflow trigger_dag <your DAG name>
Waiting for the pipeline to complete
After you've triggered your pipeline, in the DAGs view, you can watch the progress of your pipeline while it is running. As each component runs, the outline color of the component in the DAG graph will change to show its state. When a component has finished processing the outline will turn dark green to show that it's done.
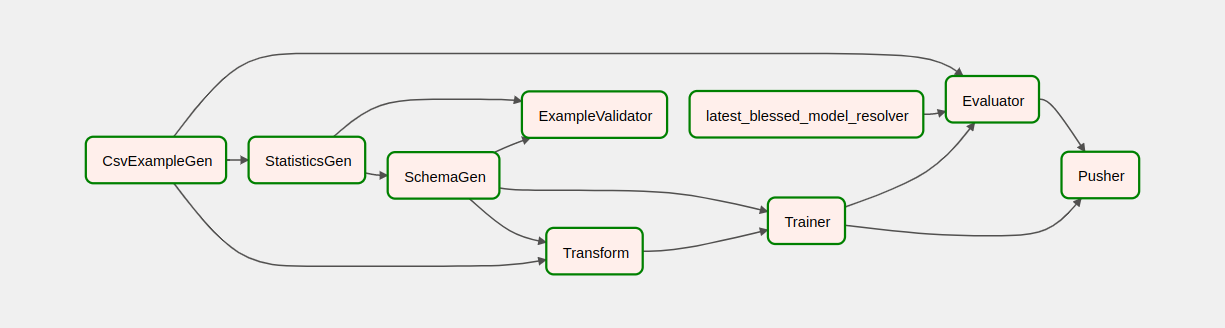
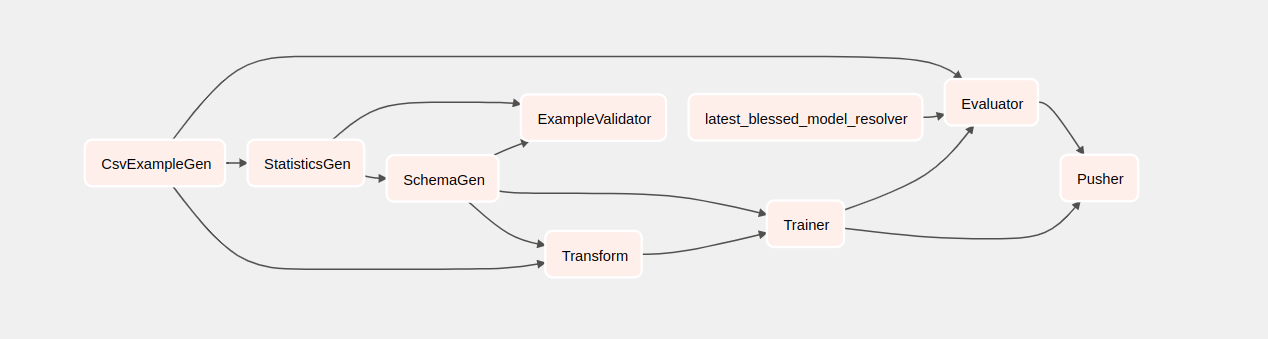
Understanding the components
Now we will look at the components of this pipeline in detail, and individually look at the outputs produced by each step in the pipeline.
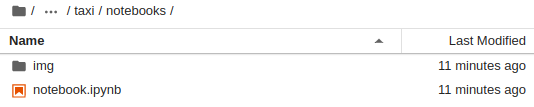
In JupyterLab go to
~/tfx/tfx/examples/airflow_workshop/taxi/notebooks/Open notebook.ipynb.
Continue the lab in the notebook, and run each cell by clicking the Run (
 )
icon at the top of the screen. Alternatively, you can execute the code in a
cell with SHIFT + ENTER.
)
icon at the top of the screen. Alternatively, you can execute the code in a
cell with SHIFT + ENTER.
Read the narrative and make sure you understand what's happening in each cell.