
| |  GitHubでソースを表示 GitHubでソースを表示 | |
概要
低解像度の対応物から高解像度(HR)画像を復元するタスクは、一般に単一画像超解像(SISR)と呼ばれます。
(ここで使用されるモデルはESRGANです:強化された超解像ジェネレーティブ敵対ネットワークESRGANを)。そして、TensorFlow Liteを使用して、事前トレーニングされたモデルで推論を実行します。
TFLiteモデルは、このから変換された実装TFハブ上でホストされています。変換したモデルは、50x50の低解像度画像を200x200の高解像度画像(倍率= 4)にアップサンプリングすることに注意してください。別の入力サイズまたはスケール係数が必要な場合は、元のモデルを再変換または再トレーニングする必要があります。
設定
まず、必要なライブラリをインストールしましょう。
pip install matplotlib tensorflow tensorflow-hub
依存関係をインポートします。
import tensorflow as tf
import tensorflow_hub as hub
import matplotlib.pyplot as plt
print(tf.__version__)
2.7.0
ESRGANモデルをダウンロードして変換します
model = hub.load("https://tfhub.dev/captain-pool/esrgan-tf2/1")
concrete_func = model.signatures[tf.saved_model.DEFAULT_SERVING_SIGNATURE_DEF_KEY]

@tf.function(input_signature=[tf.TensorSpec(shape=[1, 50, 50, 3], dtype=tf.float32)])
def f(input):
  return concrete_func(input);

converter = tf.lite.TFLiteConverter.from_concrete_functions([f.get_concrete_function()], model)
converter.optimizations = [tf.lite.Optimize.DEFAULT]
tflite_model = converter.convert()

# Save the TF Lite model.
with tf.io.gfile.GFile('ESRGAN.tflite', 'wb') as f:
  f.write(tflite_model)

esrgan_model_path = './ESRGAN.tflite'
WARNING:absl:Found untraced functions such as restored_function_body, restored_function_body, restored_function_body, restored_function_body, restored_function_body while saving (showing 5 of 335). These functions will not be directly callable after loading.
INFO:tensorflow:Assets written to: /tmp/tmpinlbbz0t/assets
INFO:tensorflow:Assets written to: /tmp/tmpinlbbz0t/assets
2021-11-16 12:15:19.621471: W tensorflow/compiler/mlir/lite/python/tf_tfl_flatbuffer_helpers.cc:363] Ignored output_format.
2021-11-16 12:15:19.621517: W tensorflow/compiler/mlir/lite/python/tf_tfl_flatbuffer_helpers.cc:366] Ignored drop_control_dependency.
WARNING:absl:Buffer deduplication procedure will be skipped when flatbuffer library is not properly loaded
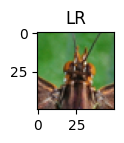
テストイメージ(昆虫の頭)をダウンロードします。
test_img_path = tf.keras.utils.get_file('lr.jpg', 'https://raw.githubusercontent.com/tensorflow/examples/master/lite/examples/super_resolution/android/app/src/main/assets/lr-1.jpg')
Downloading data from https://raw.githubusercontent.com/tensorflow/examples/master/lite/examples/super_resolution/android/app/src/main/assets/lr-1.jpg
16384/6432 [============================================================================] - 0s 0us/step
TensorFlowLiteを使用して超解像画像を生成する
lr = tf.io.read_file(test_img_path)
lr = tf.image.decode_jpeg(lr)
lr = tf.expand_dims(lr, axis=0)
lr = tf.cast(lr, tf.float32)

# Load TFLite model and allocate tensors.
interpreter = tf.lite.Interpreter(model_path=esrgan_model_path)
interpreter.allocate_tensors()

# Get input and output tensors.
input_details = interpreter.get_input_details()
output_details = interpreter.get_output_details()

# Run the model
interpreter.set_tensor(input_details[0]['index'], lr)
interpreter.invoke()

# Extract the output and postprocess it
output_data = interpreter.get_tensor(output_details[0]['index'])
sr = tf.squeeze(output_data, axis=0)
sr = tf.clip_by_value(sr, 0, 255)
sr = tf.round(sr)
sr = tf.cast(sr, tf.uint8)
結果を視覚化する
lr = tf.cast(tf.squeeze(lr, axis=0), tf.uint8)
plt.figure(figsize = (1, 1))
plt.title('LR')
plt.imshow(lr.numpy());
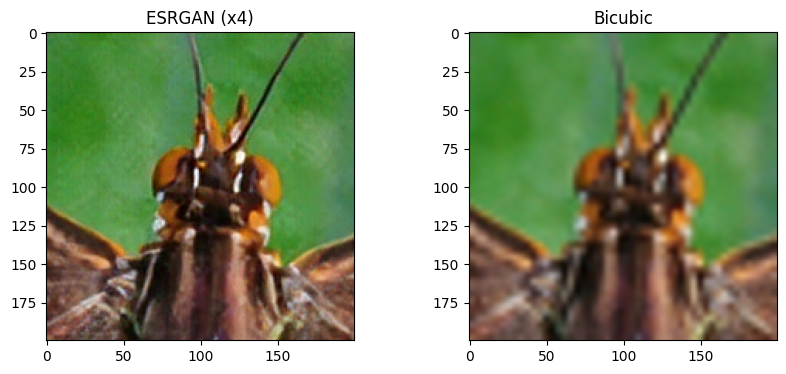
plt.figure(figsize=(10, 4))
plt.subplot(1, 2, 1)
plt.title(f'ESRGAN (x4)')
plt.imshow(sr.numpy());
bicubic = tf.image.resize(lr, [200, 200], tf.image.ResizeMethod.BICUBIC)
bicubic = tf.cast(bicubic, tf.uint8)
plt.subplot(1, 2, 2)
plt.title('Bicubic')
plt.imshow(bicubic.numpy());
パフォーマンスベンチマーク
パフォーマンスベンチマーク番号はツールで生成され、ここで説明しました。
| モデル名 | モデルサイズ | 端末 | CPU | GPU |
|---|---|---|---|---|
| 超解像(ESRGAN) | 4.8 Mb | Pixel 3 | 586.8ms * | 128.6ms |
| Pixel 4 | 385.1ms * | 130.3ms |
使用* 4つのスレッド