GitHub에서 소스 보기 GitHub에서 소스 보기 |
데이터를 효율적으로 읽으려면 데이터를 직렬화하여 각각을 선형적으로 읽을 수 있는 파일 세트(각각 100~200MB)에 저장하면 도움이 될 수 있습니다. 데이터가 네트워크를 통해 스트리밍되는 경우에는 특히 그렇습니다. 또한 데이터 전처리를 캐싱하는 데도 유용할 수 있습니다.
TFRecord 형식은 일련의 이진 레코드를 저장하기 위한 단순한 형식입니다.
프로토콜 버퍼는 구조화된 데이터의 효율적인 직렬화를 위한 플랫폼 및 언어 간 라이브러리입니다.
프로토콜 메시지는 .proto 파일로 정의되며 메시지 유형을 이해하는 가장 쉬운 방법인 경우가 많습니다.
이 노트북은 tf.Example 메시지를 생성 및 구문 분석하고 사용한 다음 tf.Example 메시지를 .tfrecord 파일 사이에서 직렬화하고 쓰기 및 읽기를 수행하는 방법을 보여줍니다.
참고: 유용하기는 하지만 이러한 구조는 선택적입니다. tf.data를 사용하면서 데이터 읽기가 훈련에 계속 병목 현상을 일으키는 경우가 아니라면 TFRecords를 사용하도록 기존 코드를 변환할 필요는 없습니다. 데이터세트 성능에 대한 유용한 정보는 데이터 입력 파이프라인 성능을 참조하세요.
참고: 일반적으로, I/O를 병렬화할 수 있도록 여러 파일에 데이터를 분할해야 합니다(단일 호스트 내에서, 또는 여러 호스트에서). 경험상 데이터를 읽는 호스트 수보다 파일 수가 최소 10배 이상 되어야 합니다. 이와 동시에 I/O 프리페치의 이점을 누릴 수 있으려면 각 파일이 충분히 커야 합니다(최소 10MB 이상, 이상적으로는 100MB 이상). 예를 들어, X GB의 데이터가 있고 최대 N개의 호스트에서 훈련할 계획이라고 가정해 보겠습니다. 이상적으로, ~ X/(10*N)가 10MB 이상(이상적으로는 100MB 이상)이면 데이터를 ~ 10*N 파일로 분할해야 합니다. 이보다 적으면 병렬 처리의 이점과 I/O 프리페치의 이점을 절충하기 위해 더 적은 수의 샤드를 만들어야 할 수 있습니다.
!pip install -U tf-hub-nightly
import tensorflow_hub as hub
from tensorflow.keras import layers
import tensorflow as tf

import numpy as np
import IPython.display as display
2022-12-14 21:04:52.917742: W tensorflow/compiler/xla/stream_executor/platform/default/dso_loader.cc:64] Could not load dynamic library 'libnvinfer.so.7'; dlerror: libnvinfer.so.7: cannot open shared object file: No such file or directory
2022-12-14 21:04:52.917858: W tensorflow/compiler/xla/stream_executor/platform/default/dso_loader.cc:64] Could not load dynamic library 'libnvinfer_plugin.so.7'; dlerror: libnvinfer_plugin.so.7: cannot open shared object file: No such file or directory
2022-12-14 21:04:52.917868: W tensorflow/compiler/tf2tensorrt/utils/py_utils.cc:38] TF-TRT Warning: Cannot dlopen some TensorRT libraries. If you would like to use Nvidia GPU with TensorRT, please make sure the missing libraries mentioned above are installed properly.
tf.train.Example
tf.Example의 데이터 형식
기본적으로 tf.Example은 {"string": tf.train.Feature} 매핑입니다.
tf.train.Feature 메시지 유형은 다음 3가지 유형 중 하나를 허용할 수 있습니다(.proto 파일 참조). 다른 대부분의 일반 형식은 다음 중 하나로 강제 변환할 수 있습니다.
tf.train.BytesList(다음 유형을 강제 변환할 수 있음)
stringbyte
tf.train.FloatList(다음 유형을 강제 변환할 수 있음)
float(float32)double(float64)
tf.train.Int64List(다음 유형을 강제 변환할 수 있음)
boolenumint32uint32int64uint64
표준 TensorFlow 유형을 tf.Example 호환 tf.train.Feature 로 변환하려면 아래 바로 가기 함수를 사용할 수 있습니다. 각 함수는 스칼라 입력 값을 받아들여 위의 세 가지 list 유형 중 하나를 포함하는 tf.train.Feature를 반환합니다.
# The following functions can be used to convert a value to a type compatible
# with tf.train.Example.

def _bytes_feature(value):
  """Returns a bytes_list from a string / byte."""
  if isinstance(value, type(tf.constant(0))):
    value = value.numpy() # BytesList won't unpack a string from an EagerTensor.
  return tf.train.Feature(bytes_list=tf.train.BytesList(value=[value]))

def _float_feature(value):
  """Returns a float_list from a float / double."""
  return tf.train.Feature(float_list=tf.train.FloatList(value=[value]))

def _int64_feature(value):
  """Returns an int64_list from a bool / enum / int / uint."""
  return tf.train.Feature(int64_list=tf.train.Int64List(value=[value]))
참고: 단순화를 위해 이 예에서는 스칼라 입력만 사용합니다. 스칼라가 아닌 특성을 처리하는 가장 간단한 방법은 tf.io.serialize_tensor를 사용하여 텐서를 이진 문자열로 변환하는 것입니다. 문자열은 tensorflow에서 스칼라입니다. 이진 문자열을 다시 텐서로 변환하려면 tf.io.parse_tensor를 사용하세요.
다음은 이러한 함수의 작동 방식을 보여주는 몇 가지 예입니다. 다양한 입력 유형과 표준화된 출력 유형에 주목하세요. 함수의 입력 유형이 위에서 언급 한 강제 변환할 수 있는 유형 중 하나와 일치하지 않으면 함수에서 예외가 발생합니다(예: 1.0은 부동 소수점이어서 _int64_feature(1.0) 오류가 발생하므로 대신 _float_feature 함수와 함께 사용해야 함).
print(_bytes_feature(b'test_string'))
print(_bytes_feature(u'test_bytes'.encode('utf-8')))

print(_float_feature(np.exp(1)))

print(_int64_feature(True))
print(_int64_feature(1))
bytes_list {
  value: "test_string"
}

bytes_list {
  value: "test_bytes"
}

float_list {
  value: 2.7182817459106445
}

int64_list {
  value: 1
}

int64_list {
  value: 1
}
.SerializeToString 메서드를 사용하여 모든 proto 메시지를 이진 문자열로 직렬화할 수 있습니다.
feature = _float_feature(np.exp(1))

feature.SerializeToString()
b'\x12\x06\n\x04T\xf8-@'
tf.Example 메시지 작성하기
기존 데이터에서 tf.Example 메시지를 작성한다고 가정해 보겠습니다. 실제로 데이터세트는 어디서든 올 수 있지만 단일 관측에서 tf.Example 메시지를 작성하는 절차는 같습니다.
각 관측 내에서 각 값은 위의 함수 중 하나를 사용하여 3가지 호환 유형 중 하나를 포함하는
tf.train.Feature로 변환해야 합니다.특성 이름 문자열을 #1에서 생성된 인코딩된 특성 값과 연결하는 맵(사전)을 생성합니다.
2단계에서 생성한 맵은
Features메시지로 변환됩니다.
이 노트북에서는 NumPy를 사용하여 데이터세트를 만듭니다.
이 데이터세트에는 4가지 특성이 있습니다.
- 확률이 동일한 부울 특성
False또는True [0, 5]에서 균일하게 무작위로 선택된 정수 특성- 정수 특성을 인덱스로 사용하여 문자열 테이블에서 생성된 문자열 특성
- 표준 정규 분포의 부동 특성
위의 각 분포에서 독립적으로 동일하게 분포된 관측 값 10,000개로 구성된 표본을 고려하겠습니다.
# The number of observations in the dataset.
n_observations = int(1e4)

# Boolean feature, encoded as False or True.
feature0 = np.random.choice([False, True], n_observations)

# Integer feature, random from 0 to 4.
feature1 = np.random.randint(0, 5, n_observations)

# String feature.
strings = np.array([b'cat', b'dog', b'chicken', b'horse', b'goat'])
feature2 = strings[feature1]

# Float feature, from a standard normal distribution.
feature3 = np.random.randn(n_observations)
이러한 각 특성은 _bytes_feature , _float_feature , _int64_feature 중 하나를 사용하여 tf.Example 호환 유형으로 강제 변환할 수 있습니다. 그런 다음, 이러한 인코딩된 특성에서 tf.Example 메시지를 작성할 수 있습니다.
def serialize_example(feature0, feature1, feature2, feature3):
  """
  Creates a tf.train.Example message ready to be written to a file.
  """
  # Create a dictionary mapping the feature name to the tf.train.Example-compatible
  # data type.
  feature = {
      'feature0': _int64_feature(feature0),
      'feature1': _int64_feature(feature1),
      'feature2': _bytes_feature(feature2),
      'feature3': _float_feature(feature3),
  }

  # Create a Features message using tf.train.Example.

  example_proto = tf.train.Example(features=tf.train.Features(feature=feature))
  return example_proto.SerializeToString()
예를 들어, 데이터세트에서 얻은 단일 관측 [False, 4, bytes('goat'), 0.9876]이 있다고 하겠습니다. create_message()를 사용하여 이 관측에 대한 tf.Example 메시지를 작성하고 인쇄할 수 있습니다. 각 단일 관측은 위의 조건에 따라 Features 메시지로 작성됩니다. tf.Example 메시지는 Features 메시지 주변에서 단지 래퍼로만 작동합니다.
# This is an example observation from the dataset.

example_observation = []

serialized_example = serialize_example(False, 4, b'goat', 0.9876)
serialized_example
b'\nR\n\x14\n\x08feature2\x12\x08\n\x06\n\x04goat\n\x11\n\x08feature1\x12\x05\x1a\x03\n\x01\x04\n\x14\n\x08feature3\x12\x08\x12\x06\n\x04[\xd3|?\n\x11\n\x08feature0\x12\x05\x1a\x03\n\x01\x00'
메시지를 디코딩하려면 tf.train.Example.FromString 메서드를 사용합니다.
example_proto = tf.train.Example.FromString(serialized_example)
example_proto
features {
  feature {
    key: "feature0"
    value {
      int64_list {
        value: 0
      }
    }
  }
  feature {
    key: "feature1"
    value {
      int64_list {
        value: 4
      }
    }
  }
  feature {
    key: "feature2"
    value {
      bytes_list {
        value: "goat"
      }
    }
  }
  feature {
    key: "feature3"
    value {
      float_list {
        value: 0.9876000285148621
      }
    }
  }
}
TF 레코드 형식 세부 사항
TFRecord 파일에는 일련의 레코드가 포함됩니다. 파일은 순차적으로만 읽을 수 있습니다.
각 레코드에는 데이터 페이로드에 대한 바이트 문자열과 데이터 길이 및 무결성 검사를 위한 CRC32C(Castagnoli 다항식을 사용하는 32비트 CRC) 해시가 포함됩니다.
각 레코드는 다음 형식으로 저장됩니다.
uint64 length
uint32 masked_crc32_of_length
byte   data[length]
uint32 masked_crc32_of_data
이 레코드는 함께 연결되어 파일을 생성합니다. CRC는 여기서 설명하며 CRC 마스크는 다음과 같습니다.
masked_crc = ((crc >> 15) | (crc << 17)) + 0xa282ead8ul
참고: TFRecord 파일에서 tf.train.Example을 사용할 필요는 없습니다. tf.train.Example은 사전을 바이트 문자열로 직렬화하는 방법일 뿐입니다. TensorFlow에서 디코딩할 수 있는 모든 바이트 문자열은 TFRecord 파일에 저장할 수 있습니다. 텍스트 줄, JSON(tf.io.decode_json_example 사용), 인코딩된 이미지 데이터 또는 직렬화된 tf.Tensors(tf.io.serialize_tensor/tf.io.parse_tensor 사용) 등을 예로 들 수 있습니다. 더 많은 옵션은 tf.io 모듈을 참조하세요.
tf.data를 사용한 TFRecord 파일
tf.data 모듈은 TensorFlow에서 데이터를 읽고 쓰기 위한 도구를 제공합니다.
TFRecord 파일 작성하기
데이터를 데이터세트로 가져오는 가장 쉬운 방법은 from_tensor_slices 메서드를 사용하는 것입니다.
배열에 적용했을 때는 스칼라의 데이터세트를 반환합니다.
tf.data.Dataset.from_tensor_slices(feature1)
<TensorSliceDataset element_spec=TensorSpec(shape=(), dtype=tf.int64, name=None)>
배열의 튜플에 적용하면 튜플의 데이터세트를 반환합니다.
features_dataset = tf.data.Dataset.from_tensor_slices((feature0, feature1, feature2, feature3))
features_dataset
<TensorSliceDataset element_spec=(TensorSpec(shape=(), dtype=tf.bool, name=None), TensorSpec(shape=(), dtype=tf.int64, name=None), TensorSpec(shape=(), dtype=tf.string, name=None), TensorSpec(shape=(), dtype=tf.float64, name=None))>
# Use `take(1)` to only pull one example from the dataset.
for f0,f1,f2,f3 in features_dataset.take(1):
  print(f0)
  print(f1)
  print(f2)
  print(f3)
tf.Tensor(False, shape=(), dtype=bool)
tf.Tensor(3, shape=(), dtype=int64)
tf.Tensor(b'horse', shape=(), dtype=string)
tf.Tensor(1.0832757175695589, shape=(), dtype=float64)
tf.data.Dataset.map 메서드를 사용하여 Dataset 각 요소에 함수를 적용합니다.
매핑된 함수는 TensorFlow 그래프 모드에서 작동해야 합니다(tf.Tensors에서 작동하고 이를 반환해야 함). serialize_example과 같이 텐서가 아닌 함수는 tf.py_function으로 래핑하여 호환되도록 만들 수 있습니다.
tf.py_function 사용하려면 다른 방식으로는 사용할 수 없는 형상과 유형 정보를 지정해야 합니다.
def tf_serialize_example(f0,f1,f2,f3):
  tf_string = tf.py_function(
    serialize_example,
    (f0, f1, f2, f3),  # Pass these args to the above function.
    tf.string)      # The return type is `tf.string`.
  return tf.reshape(tf_string, ()) # The result is a scalar.
tf_serialize_example(f0, f1, f2, f3)
<tf.Tensor: shape=(), dtype=string, numpy=b'\nS\n\x15\n\x08feature2\x12\t\n\x07\n\x05horse\n\x11\n\x08feature1\x12\x05\x1a\x03\n\x01\x03\n\x14\n\x08feature3\x12\x08\x12\x06\n\x04\xc7\xa8\x8a?\n\x11\n\x08feature0\x12\x05\x1a\x03\n\x01\x00'>
이 함수를 데이터세트의 각 요소에 적용합니다.
serialized_features_dataset = features_dataset.map(tf_serialize_example)
serialized_features_dataset
<MapDataset element_spec=TensorSpec(shape=(), dtype=tf.string, name=None)>
def generator():
  for features in features_dataset:
    yield serialize_example(*features)
serialized_features_dataset = tf.data.Dataset.from_generator(
    generator, output_types=tf.string, output_shapes=())
serialized_features_dataset
<FlatMapDataset element_spec=TensorSpec(shape=(), dtype=tf.string, name=None)>
그리고 TFRecord 파일에 이 내용을 작성합니다.
filename = 'test.tfrecord'
writer = tf.data.experimental.TFRecordWriter(filename)
writer.write(serialized_features_dataset)
WARNING:tensorflow:From /tmpfs/tmp/ipykernel_657168/3575438268.py:2: TFRecordWriter.__init__ (from tensorflow.python.data.experimental.ops.writers) is deprecated and will be removed in a future version.
Instructions for updating:
To write TFRecords to disk, use `tf.io.TFRecordWriter`. To save and load the contents of a dataset, use `tf.data.experimental.save` and `tf.data.experimental.load`
TFRecord 파일 읽기
tf.data.TFRecordDataset 클래스를 사용하여 TFRecord 파일을 읽을 수도 있습니다.
tf.data를 사용하여 TFRecord 파일을 소비하기 위한 자세한 내용은 여기에서 확인할 수 있습니다.
TFRecordDataset를 사용하면 입력 데이터를 표준화하고 성능을 최적화하는 데 유용할 수 있습니다.
filenames = [filename]
raw_dataset = tf.data.TFRecordDataset(filenames)
raw_dataset
<TFRecordDatasetV2 element_spec=TensorSpec(shape=(), dtype=tf.string, name=None)>
이 시점에서 데이터세트에는 직렬화된 tf.train.Example 메시지가 포함됩니다. 반복 실행하면 메시지가 스칼라 문자열 텐서로 반환됩니다.
.take 메서드를 사용하여 처음 10개의 레코드만 표시합니다.
참고: tf.data.Dataset의 반복 실행은 즉시 실행이 활성화된 경우에만 작동합니다.
for raw_record in raw_dataset.take(10):
  print(repr(raw_record))
<tf.Tensor: shape=(), dtype=string, numpy=b'\nS\n\x15\n\x08feature2\x12\t\n\x07\n\x05horse\n\x14\n\x08feature3\x12\x08\x12\x06\n\x04\xc7\xa8\x8a?\n\x11\n\x08feature1\x12\x05\x1a\x03\n\x01\x03\n\x11\n\x08feature0\x12\x05\x1a\x03\n\x01\x00'>
<tf.Tensor: shape=(), dtype=string, numpy=b'\nS\n\x11\n\x08feature0\x12\x05\x1a\x03\n\x01\x01\n\x15\n\x08feature2\x12\t\n\x07\n\x05horse\n\x11\n\x08feature1\x12\x05\x1a\x03\n\x01\x03\n\x14\n\x08feature3\x12\x08\x12\x06\n\x04RB\xd7\xbe'>
<tf.Tensor: shape=(), dtype=string, numpy=b'\nU\n\x11\n\x08feature1\x12\x05\x1a\x03\n\x01\x02\n\x17\n\x08feature2\x12\x0b\n\t\n\x07chicken\n\x11\n\x08feature0\x12\x05\x1a\x03\n\x01\x01\n\x14\n\x08feature3\x12\x08\x12\x06\n\x04Z\xe9-\xc0'>
<tf.Tensor: shape=(), dtype=string, numpy=b'\nU\n\x11\n\x08feature1\x12\x05\x1a\x03\n\x01\x02\n\x14\n\x08feature3\x12\x08\x12\x06\n\x04\x95\xc9j\xbe\n\x17\n\x08feature2\x12\x0b\n\t\n\x07chicken\n\x11\n\x08feature0\x12\x05\x1a\x03\n\x01\x00'>
<tf.Tensor: shape=(), dtype=string, numpy=b'\nQ\n\x11\n\x08feature0\x12\x05\x1a\x03\n\x01\x01\n\x14\n\x08feature3\x12\x08\x12\x06\n\x04\xce#\xdb\xbe\n\x13\n\x08feature2\x12\x07\n\x05\n\x03cat\n\x11\n\x08feature1\x12\x05\x1a\x03\n\x01\x00'>
<tf.Tensor: shape=(), dtype=string, numpy=b'\nU\n\x14\n\x08feature3\x12\x08\x12\x06\n\x04\x8eO\xe9>\n\x17\n\x08feature2\x12\x0b\n\t\n\x07chicken\n\x11\n\x08feature0\x12\x05\x1a\x03\n\x01\x01\n\x11\n\x08feature1\x12\x05\x1a\x03\n\x01\x02'>
<tf.Tensor: shape=(), dtype=string, numpy=b'\nR\n\x14\n\x08feature3\x12\x08\x12\x06\n\x04\xdd\xcf\xd5>\n\x14\n\x08feature2\x12\x08\n\x06\n\x04goat\n\x11\n\x08feature0\x12\x05\x1a\x03\n\x01\x01\n\x11\n\x08feature1\x12\x05\x1a\x03\n\x01\x04'>
<tf.Tensor: shape=(), dtype=string, numpy=b'\nR\n\x14\n\x08feature2\x12\x08\n\x06\n\x04goat\n\x11\n\x08feature0\x12\x05\x1a\x03\n\x01\x00\n\x11\n\x08feature1\x12\x05\x1a\x03\n\x01\x04\n\x14\n\x08feature3\x12\x08\x12\x06\n\x04\x01\xaa\xb1='>
<tf.Tensor: shape=(), dtype=string, numpy=b'\nQ\n\x11\n\x08feature1\x12\x05\x1a\x03\n\x01\x01\n\x13\n\x08feature2\x12\x07\n\x05\n\x03dog\n\x14\n\x08feature3\x12\x08\x12\x06\n\x04-\xad+\xbf\n\x11\n\x08feature0\x12\x05\x1a\x03\n\x01\x00'>
<tf.Tensor: shape=(), dtype=string, numpy=b'\nR\n\x11\n\x08feature1\x12\x05\x1a\x03\n\x01\x04\n\x14\n\x08feature2\x12\x08\n\x06\n\x04goat\n\x11\n\x08feature0\x12\x05\x1a\x03\n\x01\x01\n\x14\n\x08feature3\x12\x08\x12\x06\n\x04\xbb\xe2\x04\xbe'>
이러한 텐서는 아래 함수를 이용해 구문 분석할 수 있습니다. 여기서 feature_description이 필요한 이유는 데이터세트가 그래프 실행을 사용하고 형상과 유형을 빌드하기 위해 이 설명을 필요로 하기 때문입니다.
# Create a description of the features.
feature_description = {
    'feature0': tf.io.FixedLenFeature([], tf.int64, default_value=0),
    'feature1': tf.io.FixedLenFeature([], tf.int64, default_value=0),
    'feature2': tf.io.FixedLenFeature([], tf.string, default_value=''),
    'feature3': tf.io.FixedLenFeature([], tf.float32, default_value=0.0),
}

def _parse_function(example_proto):
  # Parse the input `tf.train.Example` proto using the dictionary above.
  return tf.io.parse_single_example(example_proto, feature_description)
또는, tf.parse example를 사용하여 전체 배치를 한 번에 구문 분석합니다. tf.data.Dataset.map 메서드를 사용하여 데이터세트의 각 항목에 이 함수를 적용합니다.
parsed_dataset = raw_dataset.map(_parse_function)
parsed_dataset
<MapDataset element_spec={'feature0': TensorSpec(shape=(), dtype=tf.int64, name=None), 'feature1': TensorSpec(shape=(), dtype=tf.int64, name=None), 'feature2': TensorSpec(shape=(), dtype=tf.string, name=None), 'feature3': TensorSpec(shape=(), dtype=tf.float32, name=None)}>
즉시 실행을 사용하여 데이터세트에 관측 값을 표시합니다. 이 데이터세트에는 10,000개의 관측 값이 있지만 처음 10개만 표시됩니다. 데이터는 특성의 사전으로 표시됩니다. 각 항목은 tf.Tensor이며 이 텐서의 numpy 요소는 특성 값을 표시합니다.
for parsed_record in parsed_dataset.take(10):
  print(repr(parsed_record))
{'feature0': <tf.Tensor: shape=(), dtype=int64, numpy=0>, 'feature1': <tf.Tensor: shape=(), dtype=int64, numpy=3>, 'feature2': <tf.Tensor: shape=(), dtype=string, numpy=b'horse'>, 'feature3': <tf.Tensor: shape=(), dtype=float32, numpy=1.0832757>}
{'feature0': <tf.Tensor: shape=(), dtype=int64, numpy=1>, 'feature1': <tf.Tensor: shape=(), dtype=int64, numpy=3>, 'feature2': <tf.Tensor: shape=(), dtype=string, numpy=b'horse'>, 'feature3': <tf.Tensor: shape=(), dtype=float32, numpy=-0.42042786>}
{'feature0': <tf.Tensor: shape=(), dtype=int64, numpy=1>, 'feature1': <tf.Tensor: shape=(), dtype=int64, numpy=2>, 'feature2': <tf.Tensor: shape=(), dtype=string, numpy=b'chicken'>, 'feature3': <tf.Tensor: shape=(), dtype=float32, numpy=-2.7173676>}
{'feature0': <tf.Tensor: shape=(), dtype=int64, numpy=0>, 'feature1': <tf.Tensor: shape=(), dtype=int64, numpy=2>, 'feature2': <tf.Tensor: shape=(), dtype=string, numpy=b'chicken'>, 'feature3': <tf.Tensor: shape=(), dtype=float32, numpy=-0.2292846>}
{'feature0': <tf.Tensor: shape=(), dtype=int64, numpy=1>, 'feature1': <tf.Tensor: shape=(), dtype=int64, numpy=0>, 'feature2': <tf.Tensor: shape=(), dtype=string, numpy=b'cat'>, 'feature3': <tf.Tensor: shape=(), dtype=float32, numpy=-0.42800754>}
{'feature0': <tf.Tensor: shape=(), dtype=int64, numpy=1>, 'feature1': <tf.Tensor: shape=(), dtype=int64, numpy=2>, 'feature2': <tf.Tensor: shape=(), dtype=string, numpy=b'chicken'>, 'feature3': <tf.Tensor: shape=(), dtype=float32, numpy=0.45568508>}
{'feature0': <tf.Tensor: shape=(), dtype=int64, numpy=1>, 'feature1': <tf.Tensor: shape=(), dtype=int64, numpy=4>, 'feature2': <tf.Tensor: shape=(), dtype=string, numpy=b'goat'>, 'feature3': <tf.Tensor: shape=(), dtype=float32, numpy=0.4176015>}
{'feature0': <tf.Tensor: shape=(), dtype=int64, numpy=0>, 'feature1': <tf.Tensor: shape=(), dtype=int64, numpy=4>, 'feature2': <tf.Tensor: shape=(), dtype=string, numpy=b'goat'>, 'feature3': <tf.Tensor: shape=(), dtype=float32, numpy=0.08675004>}
{'feature0': <tf.Tensor: shape=(), dtype=int64, numpy=0>, 'feature1': <tf.Tensor: shape=(), dtype=int64, numpy=1>, 'feature2': <tf.Tensor: shape=(), dtype=string, numpy=b'dog'>, 'feature3': <tf.Tensor: shape=(), dtype=float32, numpy=-0.6706112>}
{'feature0': <tf.Tensor: shape=(), dtype=int64, numpy=1>, 'feature1': <tf.Tensor: shape=(), dtype=int64, numpy=4>, 'feature2': <tf.Tensor: shape=(), dtype=string, numpy=b'goat'>, 'feature3': <tf.Tensor: shape=(), dtype=float32, numpy=-0.12977116>}
여기서 tf.parse_example 함수는 tf.Example 필드를 표준 텐서로 풀어 넣습니다.
Python에서 TFRecord 파일
tf.io 모듈에는 TFRecord 파일을 읽고 쓰기 위한 순수 Python 함수도 포함되어 있습니다.
TFRecord 파일 작성하기
다음으로, test.tfrecord 파일에 10,000개의 관측 값을 작성합니다. 각 관측 값은 tf.Example 메시지로 변환된 다음 파일에 작성됩니다. 그러면 test.tfrecord 파일이 생성되었는지 확인할 수 있습니다.
# Write the `tf.train.Example` observations to the file.
with tf.io.TFRecordWriter(filename) as writer:
  for i in range(n_observations):
    example = serialize_example(feature0[i], feature1[i], feature2[i], feature3[i])
    writer.write(example)
/tmpfs/tmp/ipykernel_657168/1733628823.py:16: DeprecationWarning: In future, it will be an error for 'np.bool_' scalars to be interpreted as an index
  return tf.train.Feature(int64_list=tf.train.Int64List(value=[value]))
du -sh {filename}984K test.tfrecord
TFRecord 파일 읽기
이 직렬화된 텐서는 tf.train.Example.ParseFromString을 사용하여 쉽게 구문 분석할 수 있습니다.
filenames = [filename]
raw_dataset = tf.data.TFRecordDataset(filenames)
raw_dataset
<TFRecordDatasetV2 element_spec=TensorSpec(shape=(), dtype=tf.string, name=None)>
for raw_record in raw_dataset.take(1):
  example = tf.train.Example()
  example.ParseFromString(raw_record.numpy())
  print(example)
features {
  feature {
    key: "feature0"
    value {
      int64_list {
        value: 0
      }
    }
  }
  feature {
    key: "feature1"
    value {
      int64_list {
        value: 3
      }
    }
  }
  feature {
    key: "feature2"
    value {
      bytes_list {
        value: "horse"
      }
    }
  }
  feature {
    key: "feature3"
    value {
      float_list {
        value: 1.0832756757736206
      }
    }
  }
}
이는 그대로 사용하기 어려운 tf.train.Example proto를 반환하지만 기본적으로 다음을 나타냅니다.
Dict[str,
     Union[List[float],
           List[int],
           List[str]]]
다음 코드는 TensorFlow Ops를 사용하지 않고 수동으로 Example을 NumPy 배열의 사전으로 변환합니다. 자세한 내용은 PROTO 파일을 참조하세요.
result = {}
# example.features.feature is the dictionary
for key, feature in example.features.feature.items():
  # The values are the Feature objects which contain a `kind` which contains:
  # one of three fields: bytes_list, float_list, int64_list

  kind = feature.WhichOneof('kind')
  result[key] = np.array(getattr(feature, kind).value)

result
{'feature1': array([3]),
 'feature3': array([1.08327568]),
 'feature2': array([b'horse'], dtype='|S5'),
 'feature0': array([0])}
연습: 이미지 데이터 읽기 및 쓰기
이번 연습은 TFRecord를 사용하여 이미지 데이터를 읽고 쓰는 방법을 보여주는 엔드 투 엔드 예제입니다. 이미지를 입력 데이터로 사용하여 데이터를 TFRecord 파일로 작성한 다음 파일을 다시 읽고 이미지를 표시합니다.
예를 들어, 이 방법은 같은 입력 데이터세트에서 여러 모델을 사용하려는 경우에 유용합니다. 이미지 데이터를 그대로 저장하는 대신 TFRecord 형식으로 사전 처리할 수 있으며 이후의 모든 처리 및 모델링에 사용할 수 있습니다.
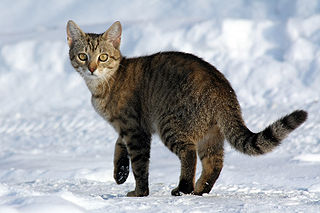
먼저, 눈 속 고양이를 보여주는 이 이미지와 건설 중인 NYC의 Williamsburg Bridge를 보여주는 이 사진을 다운로드하겠습니다.
이미지 가져오기
cat_in_snow  = tf.keras.utils.get_file(
    '320px-Felis_catus-cat_on_snow.jpg',
    'https://storage.googleapis.com/download.tensorflow.org/example_images/320px-Felis_catus-cat_on_snow.jpg')

williamsburg_bridge = tf.keras.utils.get_file(
    '194px-New_East_River_Bridge_from_Brooklyn_det.4a09796u.jpg',
    'https://storage.googleapis.com/download.tensorflow.org/example_images/194px-New_East_River_Bridge_from_Brooklyn_det.4a09796u.jpg')
Downloading data from https://storage.googleapis.com/download.tensorflow.org/example_images/320px-Felis_catus-cat_on_snow.jpg
17858/17858 [==============================] - 0s 0us/step
Downloading data from https://storage.googleapis.com/download.tensorflow.org/example_images/194px-New_East_River_Bridge_from_Brooklyn_det.4a09796u.jpg
15477/15477 [==============================] - 0s 0us/step
display.display(display.Image(filename=cat_in_snow))
display.display(display.HTML('Image cc-by: <a "href=https://commons.wikimedia.org/wiki/File:Felis_catus-cat_on_snow.jpg">Von.grzanka</a>'))

display.display(display.Image(filename=williamsburg_bridge))
display.display(display.HTML('<a "href=https://commons.wikimedia.org/wiki/File:New_East_River_Bridge_from_Brooklyn_det.4a09796u.jpg">From Wikimedia</a>'))

TFRecord 파일 작성하기
이전과 마찬가지로 특성을 tf.Example과 호환되는 유형으로 인코딩합니다. 그러면 원시 이미지 문자열 특성과 높이, 너비, 깊이 및 임의의 label 특성이 저장됩니다. 후자는 고양이 이미지와 다리 이미지를 구별하는 파일을 작성할 때 사용됩니다. 고양이 이미지에는 0을 사용하고 다리 이미지에는 1을 사용합니다.
image_labels = {
    cat_in_snow : 0,
    williamsburg_bridge : 1,
}
# This is an example, just using the cat image.
image_string = open(cat_in_snow, 'rb').read()

label = image_labels[cat_in_snow]

# Create a dictionary with features that may be relevant.
def image_example(image_string, label):
  image_shape = tf.io.decode_jpeg(image_string).shape

  feature = {
      'height': _int64_feature(image_shape[0]),
      'width': _int64_feature(image_shape[1]),
      'depth': _int64_feature(image_shape[2]),
      'label': _int64_feature(label),
      'image_raw': _bytes_feature(image_string),
  }

  return tf.train.Example(features=tf.train.Features(feature=feature))

for line in str(image_example(image_string, label)).split('\n')[:15]:
  print(line)
print('...')
features {
  feature {
    key: "depth"
    value {
      int64_list {
        value: 3
      }
    }
  }
  feature {
    key: "height"
    value {
      int64_list {
        value: 213
      }
...
이제 모든 특성이 tf.Example 메시지에 저장됩니다. 그 다음, 위의 코드를 함수화하고 예제 메시지를 images.tfrecords 이름의 파일에 작성합니다.
# Write the raw image files to `images.tfrecords`.
# First, process the two images into `tf.train.Example` messages.
# Then, write to a `.tfrecords` file.
record_file = 'images.tfrecords'
with tf.io.TFRecordWriter(record_file) as writer:
  for filename, label in image_labels.items():
    image_string = open(filename, 'rb').read()
    tf_example = image_example(image_string, label)
    writer.write(tf_example.SerializeToString())
du -sh {record_file}36K images.tfrecords
TFRecord 파일 읽기
이제 images.tfrecords 파일이 얻었으며 여기에 있는 레코드를 반복 실행하여 작성한 내용을 다시 읽을 수 있습니다. 이 예에서는 이미지만 생성하기 때문에 유일하게 필요한 특성은 원시 이미지 문자열입니다. 위에서 설명한 getter, 즉 example.features.feature['image_raw'].bytes_list.value[0]를 이용해 이를 추출합니다. 또한 레이블을 이용해 어떤 레코드가 고양이이고 어떤 것이 다리인지 결정할 수 있습니다.
raw_image_dataset = tf.data.TFRecordDataset('images.tfrecords')

# Create a dictionary describing the features.
image_feature_description = {
    'height': tf.io.FixedLenFeature([], tf.int64),
    'width': tf.io.FixedLenFeature([], tf.int64),
    'depth': tf.io.FixedLenFeature([], tf.int64),
    'label': tf.io.FixedLenFeature([], tf.int64),
    'image_raw': tf.io.FixedLenFeature([], tf.string),
}

def _parse_image_function(example_proto):
  # Parse the input tf.train.Example proto using the dictionary above.
  return tf.io.parse_single_example(example_proto, image_feature_description)

parsed_image_dataset = raw_image_dataset.map(_parse_image_function)
parsed_image_dataset
<MapDataset element_spec={'depth': TensorSpec(shape=(), dtype=tf.int64, name=None), 'height': TensorSpec(shape=(), dtype=tf.int64, name=None), 'image_raw': TensorSpec(shape=(), dtype=tf.string, name=None), 'label': TensorSpec(shape=(), dtype=tf.int64, name=None), 'width': TensorSpec(shape=(), dtype=tf.int64, name=None)}>
TFRecord 파일에서 이미지를 복구합니다.
for image_features in parsed_image_dataset:
  image_raw = image_features['image_raw'].numpy()
  display.display(display.Image(data=image_raw))